How to Apply False Eyelashes for Beginners in 6 Steps

It’s a truth universally acknowledged: False eyelashes can instantly transform your look. Whether you’re going for subtle volume or full-on glam, they’ve got you covered. But here’s the thing—if you’re new to the falsie game, they can seem tricky, if not downright intimidating. Where do you even start? How much glue is too much? And how do you keep them from falling off halfway through your night?
Breathe easy, bestie, because you’re not alone, and the good news? Applying false eyelashes is totally learnable, even for beginners. In this guide, we’ll break it all down, from picking the right lashes to nailing that application (literally). By the time you’re done, you’ll be applying falsies like a pro, and trust us—your lashes will be the envy of everyone.
Why False Lashes Are Worth It?
Before we dive into the nitty-gritty, let’s talk about why you should add falsies to your routine. Sure, mascara is great, but false lashes give you that extra oomph. They:
- Add Volume and Length: Perfect for creating a dramatic look or just subtly enhancing what you’ve got.
- Complete Any Makeup Look: From natural glam to full-on drama, false lashes tie everything together.
- Photograph Beautifully: Say goodbye to your lashes disappearing in photos.
Okay, now that you’re convinced, let’s get into how to actually apply them.
What You’ll Need
First things first, gather your tools. Having everything within arm’s reach makes the process so much easier. Here’s what you need:
- False Lashes: Choose a style that works for your vibe. Natural lashes for an everyday look, or bold ones for a special occasion.
- Lash Glue: Opt for a high-quality adhesive. Clear glue is beginner-friendly, while black glue can blend seamlessly with eyeliner.
- Tweezers or Lash Applicator: These make it easier to place the lashes precisely.
- Small Scissors: To trim the lashes for a perfect fit.
- Eyelash Curler: For blending your natural lashes with the falsies.
- Mascara: Helps bind your natural lashes to the falsies.
- Eyeliner (optional): Great for hiding the lash band and perfecting your look.
Step 1: Choose the Right Lashes
Let’s be real: Not all false lashes are created equal. Some can look too heavy for everyday wear, while others might not give you enough drama for a night out. Here’s how to choose the right pair:
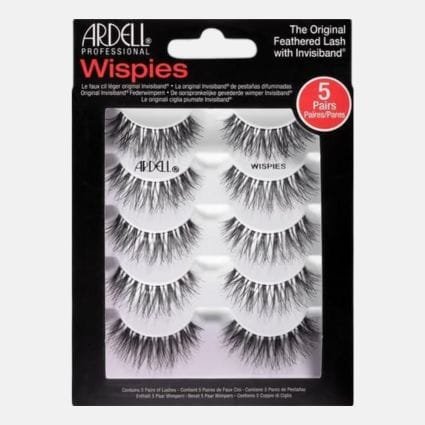
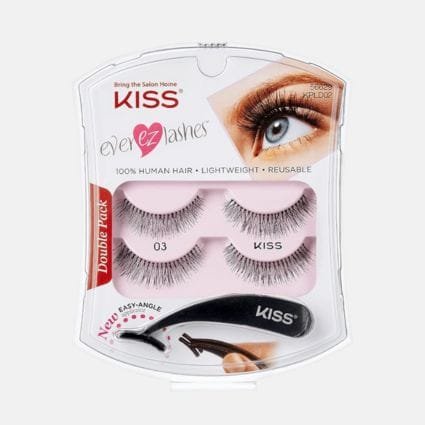
- Natural Look: Go for lashes labeled as “lightweight” or “natural.” Think Ardell Demi Wispies ($10 on Amazon) or Kiss Looks So Natural ($9 on Amazon).
- Dramatic Look: Choose fuller, denser lashes like Huda Beauty Classic Lash ($12 on Hudabeauty) or Lilly Lashes Miami ($15 on Amazon).
- Magnetic Lashes: If glue scares you, Glamnetic Magnetic Eyelashes ($20 on Amazon) are a beginner-friendly alternative.
Step 2: Prep Your Natural Lashes
Preparation is key to a seamless application. Follow these steps:
- Cleanse and Dry Your Lids: Remove any oil or makeup residue from your eyelids to help the glue adhere better.
- Curl Your Natural Lashes: Use an eyelash curler to lift your natural lashes. This creates a solid base for blending.
- Apply Mascara: A light coat of mascara adds grip to your natural lashes, helping them hold the falsies better.
Step 3: Trim the Lashes
Here’s the deal: Most false lashes are one-size-fits-all, but everyone’s eye shape is different. Trimming ensures the lashes fit comfortably.
- Measure the Lash: Place the lash strip along your lash line (without glue) to check the fit.
- Trim as Needed: Use small scissors to cut from the outer edge. Never cut from the inner corner, as this can ruin the natural taper of the lashes.
Pro Tip: Trim in small increments to avoid overcutting.
Step 4: Apply the Glue
Glue application is where many beginners get tripped up, but it’s easier than you think:
- Apply a Thin Layer: Squeeze a tiny amount of glue onto the lash band. Use a toothpick or the applicator tip to spread it evenly.
- Wait for It to Get Tacky: Let the glue sit for 20–30 seconds. This makes it sticky enough to adhere without sliding around.
- Focus on the Ends: Apply a little extra glue to the outer corners, as these tend to lift first.
Step 5: Place the Lashes
Now for the main event—applying the lashes:
- Hold the Lash with Tweezers: Grasp the lashes in the center with your tweezers or lash applicator.
- Position in the Middle: Place the lash strip as close to your natural lash line as possible, starting with the center.
- Secure the Ends: Use your fingers or tweezers to press down the inner and outer corners.
Pro Tip: Look down into a mirror rather than straight ahead. This angle makes it easier to see your lash line.
Step 6: Blend the Lashes
Once your falsies are in place, it’s time to make them look seamless:
- Press Them Together: Gently press your natural lashes and falsies together using your fingers or tweezers.
- Apply Eyeliner: If the lash band is visible, use black eyeliner to fill in any gaps.
- Touch Up with Mascara: A light coat helps bind your natural lashes to the falsies.
Common Mistakes
Nobody’s perfect, and mistakes happen. Here’s how to sidestep the most common falsie fails:
- Too Much Glue: More glue doesn’t equal better hold. Stick to a thin, even layer.
- Not Trimming the Lashes: Untrimmed lashes can poke your inner corners and feel uncomfortable. Always customize the fit.
- Skipping the Wait: Applying lashes before the glue gets tacky can lead to sliding and smudging. Patience is key!
Tips for Beginners
To make your falsie journey even smoother, here are some bonus tips:
- Practice Makes Perfect: Don’t save your first attempt for a big event. Practice a few times beforehand.
- Start with Half Lashes: If full strips feel overwhelming, try half lashes or individual clusters.
- Invest in Good Tools: Quality tweezers and glue can make all the difference.
- Reuse and Save: Clean your lashes after each use to make them last longer.
Best Beginner Lashes
Best Magnetic Lashes
Removing False Lashes
Taking off falsies is just as important as putting them on. Here’s how to do it without damaging your natural lashes:
- Soften the Glue: Use an oil-based makeup remover to dissolve the adhesive.
- Gently Peel Off: Starting at the outer corner, gently lift the lash strip.
- Clean the Lashes: Remove glue residue from the lash band with tweezers or a cotton swab.
Final Thoughts
Applying false eyelashes doesn’t have to be scary or complicated. With the right tools, techniques, and a little practice, you’ll be slaying your lash game in no time. Whether you’re a makeup newbie or a beauty enthusiast looking to level up, falsies are a fun way to enhance your look.
So grab your lashes, glue, and some confidence, and get ready to bat those fabulous lashes, babe—you’ve got this!


